Showing posts with label sweet. Show all posts

Sunday, April 11, 2021

Recipe: Hot Cross Buns

It always saddens me that Easter is not celebrated more in the US, especially when it's actually well aligned with Spring unlike how it was in Australia. Consequently that means it's actually very hard to find decent Easter Eggs and Hot Cross Buns. Thankfully husband has been hard at work on #pandemicbaking and so here's his recipe for future reference. 


Ingredients

3 tspns instant or rapid rise yeast
1/2 cup Castor sugar (Bakers' sugar)
1 1/2 cups Warm milk
4 1/4 cups bread flour
2 tsp cinnamon powder
2 tsp mixed spice (or pumpkin pie spice)
1/2 tsp salt
1 1/2 cups sultanas (golden raisins)
Zest of 1-2 oranges
1 egg
1/4 cup (35g) Extra bread flour

For Crosses 

1/2 cup flour
100 ml water

For Glaze 

1 tbsp apricot jam
2 tspn water

Method

  • Place flour, yeast, sugar, all spice, cinnamon, and salt in a large bowl. Briefly mix with stand mixer fitted with a dough hook.
  • Add butter, milk, egg, sultanas and zest.
  • Mix using a mixer or bread machine until a smooth elastic dough forms. 
  • Add extra flour if required, just enough so dough comes away from side of bowl when mixing
  • Rise 1 will  take anywhere between 30 minutes to 90 mins depending on temperature / humidity
  • Line a baking tray with paper or silicon mat
  • Punch dough to deflate and dust work surface with flour. Roll into a log to further deflate the air and cut into 12 equal pieces. 
  • Take one piece and press down with palm, then use your fingers to gather into a ball, then roll the dough briefly to form a ball.
  • Place the ball with the smooth side up on the tray. and repeat with the remaining doughsiSpray a pieceof cling wrap lightly with oil (any), then loosely place over the tray.
  • Rise 2 for 30 - 45 minutes or until 75% increased in size, preheat oven to 180 C (350F)
  • For the crosses mix flour and water until a thick runny paste forms and put into a piping bag then remove the paper and draw crosses onto the buns
  • Bake for 22 minutes, or until the surface is a deep golden brown then remove buns from the oven
  • Heat the jam and water in a pan or in the microwave and mix to combine, then brush onto the cooked buns to glaze
  • Allow to cool before serving 


Sunday, January 21, 2018

Recipe: Sugar free vegan peanut butter fudge

This recipe is one of those happy accidents, I was making sugar free white chocolate and used the wrong sweetener which split the cocoa. I decided to salvage the mess and this is the delicious result full of healthy fats. Cocoa butter is a new ingredient for me in my kitchen arsenal - it keeps high fat low carb desserts stable at room temperature and adds a creaminess without the use of dairy.

Your mileage may vary on low carb sweeteners and glycemic index. If you are keeping low carb be sensible about what works for you and switch out the erythritol for stevia or sucralose. Erythritol is the perfect sugar replacement for me when making confectionary, it has 0 impact on my blood sugar and has a pleasant cool mouth feel, you can even powder it to work like icing sugar.  Remember if you're not keeping low carb you can always use icing sugar or castor (baker's) sugar.


Sugar free vegan peanut butter fudge 


1 cup smooth peanut butter
1/2 cup coconut oil
1/2 cup cocoa butter
1 cup powdered erythritol (Swerve)
1 tspn vanilla essence


Method


  • You can use either the stove or a microwave to make
  • If using a stove add the fats to a pan and turn on low heat or use a double boiler to melt fats gently together

  • If using a microwave place all fats in a glass bowl and microwave on medium for 90 seconds
  • Add the erythritol and stir, heat for another 1-2 mins or until a spoon comes out of the mixture smooth with no visible grains 
  • If using the stove remove the pan from the heat - then add the vanilla. Otherwise you risk the alcohol causing the mixture to boil rapidly.  Stir until the vanilla is evenly distributed


  • Pour into a small tray or fudge tin and then refrigerate for 3 hours
  • Cut with a hot knife, makes approximately 40 pieces
  • 54 Calories, 6g fat, 4g carbs (net < 1g) per piece


Wednesday, January 13, 2016

Recipe: Home made Nutella (Vegan, sugar free, low carb)


Sugar Free Nutella


1 1/2 cups raw hazelnuts
1/2 cup hazelnut oil
1/4 cup coconut oil
3 tbpsn cocoa powder
2 tbpsn liquid stevia


Method


  • Roast the hazelnuts on a piece of foil at 135C (275F) for 15 minutes
  • Remove the tray from the oven and wrap the foil around the nuts, let the nuts sit for 10 minutes wrapped in foil as this will loosen the skin on the roasted nuts
  • Place the roasted kernels on one side of a clean kitchen towel, double the towel over the nuts and rub vigorously to remove the skins
  • Melt the coconut oil in a pan or microwave
  • Put the nuts and hazelnut oil into a blender and pulse until grainy
  • Add the cocoa, coconut oil and stevia
  • Blend on "Liquify" mode until a smooth liquid is formed
  • If liquid stevia is not available dissolve 4 tbspns of stevia powder into the melted coconut oil before using or a grainy texture will result
  • 1/4 cup skim milk powder can be added to get that "just like store bought" taste but compensate by adding an additional tablespoon of oil
  • You can buy hazelnut oil at Safeway or specialty stores but if not available substitute with a light vegetable oil like canola or grapeseed
  • Pour into a jar and refrigerate
  • Try not to eat the whole jar


Tuesday, July 7, 2015

Recipe: Green Tea Frappucino

It's Summer in the US and that means time for plenty of cold drinks. I bought a new blender and that means it's time for Frappucinos! These green tea ice blended drinks are delicious and a lot cheaper than a trip to the Starbucks


Green Tea Frappucino

2 tspns Matcha green tea powder
3 packets of Splenda (or 3 tspns white sugar)
1 cup whole milk or nut milk
1/2 cup cream
2 cups ice cubes

Method


  • This works very well with Almond or Cashew milk and whipping cream or use Half and Half for all the liquid
  • Matcha Powder can be bought at any Asian supermarket
  • Into the blender pour the ice and the whole milk
  • In a cup mix the matcha powder, Splenda and cream into a paste
  • Add the tea/cream mix to the blender
  • If your machine has an ice crush mode use this first, otherwise pulse on the liquify setting until small ice grains are formed
  • Makes two tumblers - top with whipped cream if desired and serve with a large shake straw 


Saturday, February 28, 2015

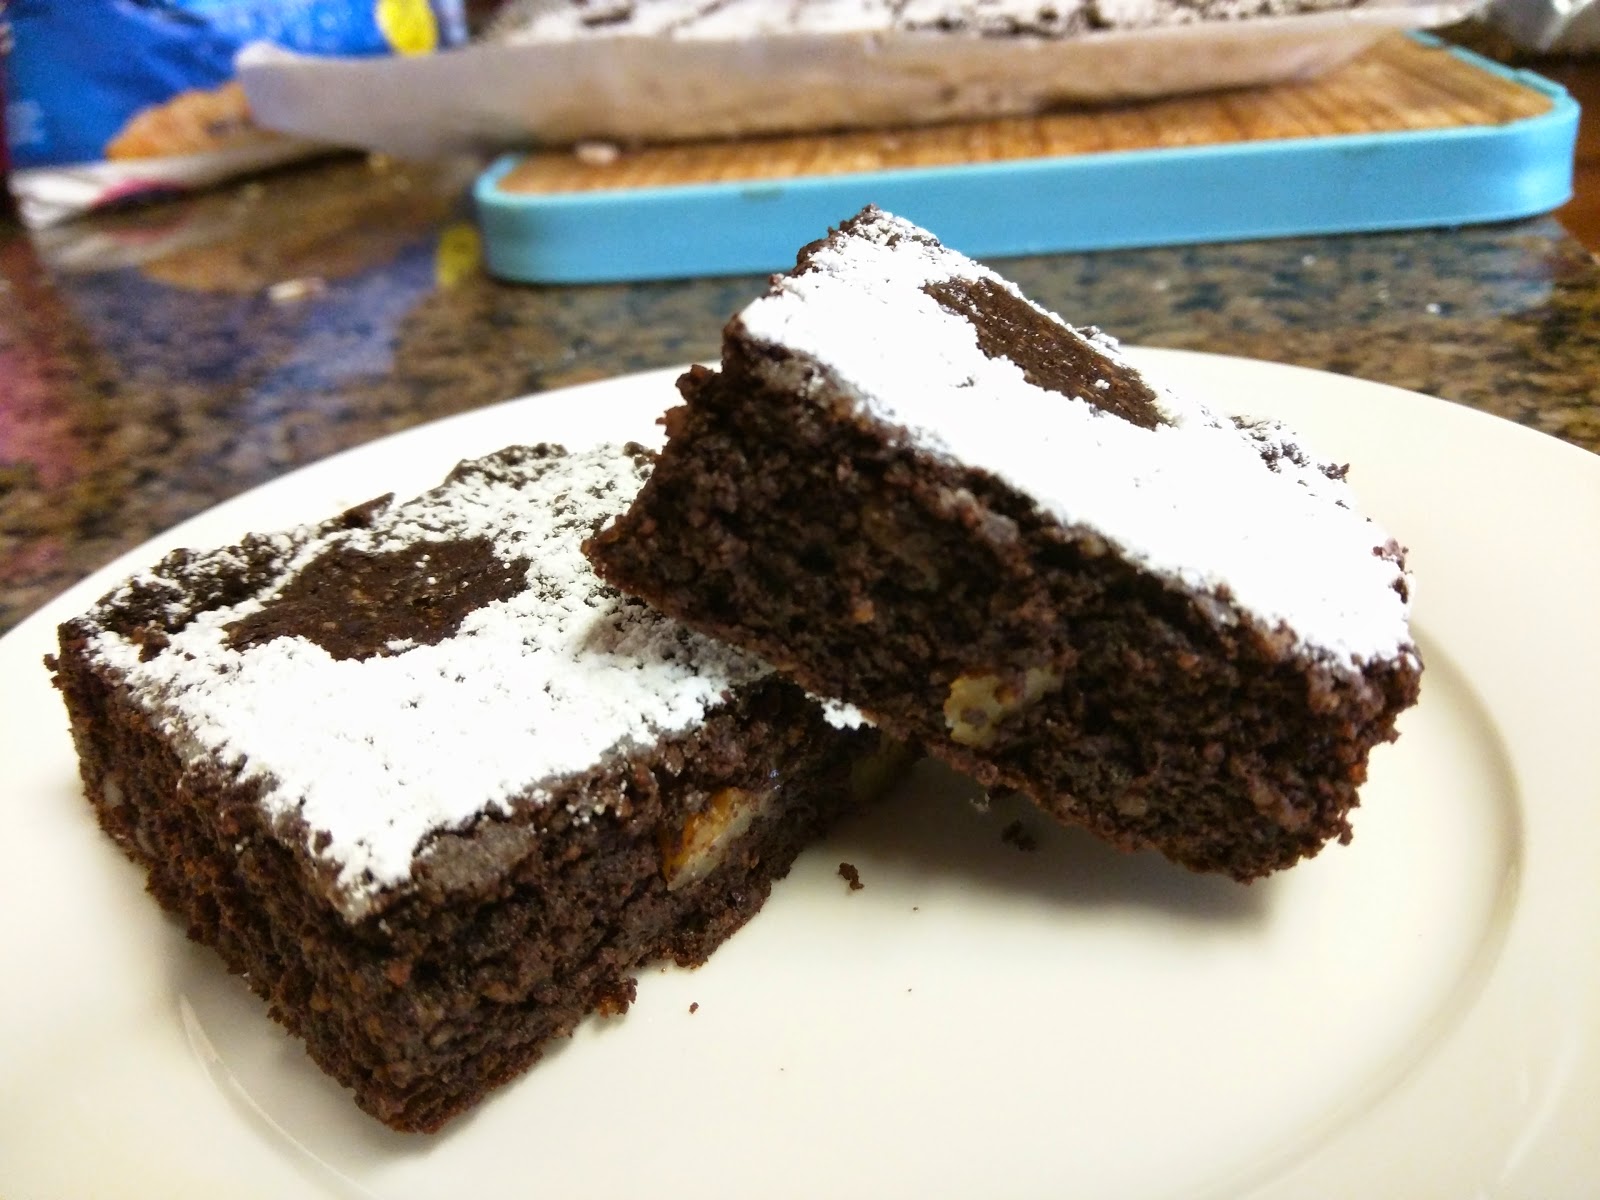
Recipe: Low carb gluten free chocolate brownies

If you can't tell I recently bought a slice tray so I'm working my way through recipes I haven't made in quite some time. This recipe is a keto adapted version of one provided to me by a coworker with gluten free food restrictions. 


Low carb gluten free chocolate brownies


1 cup almond flour/meal
1 cup walnut pieces
2 cups granulated Splenda
2 tbpsn cocoa
1 tspn baking soda
pinch of salt
1/2 cup butter
3 whole eggs
115g (4oz) unsweetened chocolate
1 tspn vanilla essence

Method


  • Preheat the oven to 180C (350F) and line a slice tin or square baking tin with wax paper
  • In a mixer add your almond flour, Splenda, cocoa, salt and baking soda and then mix on the slowest setting until combined
  • In a microwave or double boiler melt the chocolate and the butter together and then stir thoroughly
  • Add eggs and vanilla essence to the flour and mix on a medium speed until a thick batter is formed
  • Add the butter/chocolate mix to the batter continuing on medium speed until an even texture is formed; it should have an almost dough like consistency
  • Turn off the mixer and fold in your walnut pieces then turn the batter into your slice tin
  • Press with your hands or a baker's blade to evenly distribute to all corners, an even top will prevent cracking
  • Bake for 25 mins then turn onto a rack to cool
  • The texture is excellent whether you avoid wheat or not, carb eaters can replace the Splenda with half as much Brown sugar
  • You can ice the top if desired or dust with confectioner's sugar or powdered Splenda 
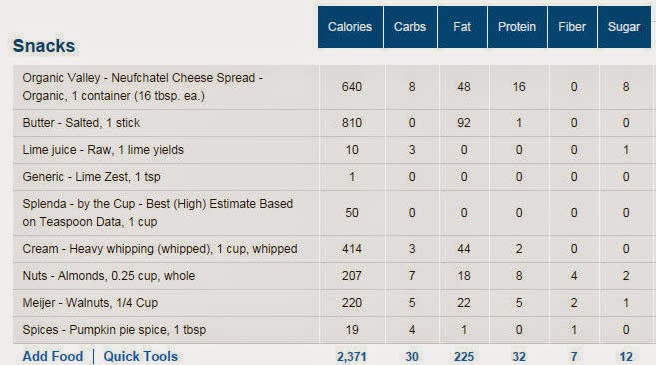
  • Cut into 16 Brownies - Macros below are for the whole batch - Each brownie is 192 Calories, 5.3 Carbs (2.6g Net), 17.5g Fat


Tuesday, February 17, 2015

Recipe: Louise Cake

Valentine's means sweets for my sweet and this Kiwi classic is my man's favourite cake. This recipe is cheap and easy to make from cupboard staples.

Louise Cake


Base:
125g butter
3/4 cup Caster sugar
3 Large eggs separated
1 3/4 cup Plain Flour
1.5 tspn baking powder

Topping:
1/4 cup Caster sugar
1 cup Coconut
1 tspn Vanilla essence
1/2 cup Jam

Method


  • Preheat oven to 170C
  • Grease and line a slice tin or cake tin
  • Separate the eggs and set the whites asside
  • In a bowl cream the butter and sugar until fluffy and pale, then add the yolks one at a time
  • Sift in the flour and baking powder and then mix until it forms a crumbly dough
  • Press into the cake tin and prick with a fork, then bake for 10 mins
  • While the base proves whip the egg whites into soft peaks
  • Slowly add the sugar and vanilla and mix until the meringue turns glossy
  • Remove the meringue from the mixer and then gently fold in the coconut
  • Remove the base from the oven and spread the jam on with a spatula. You may wish to warm the jam slightly for easier spreading
  • Spread the coconut meringue topping over the pastry and jam base and then return to the oven for another 20 mins or until the peaks are golden
  • Cool in the tin then remove and cut into squares to serve with tea


Sunday, September 28, 2014

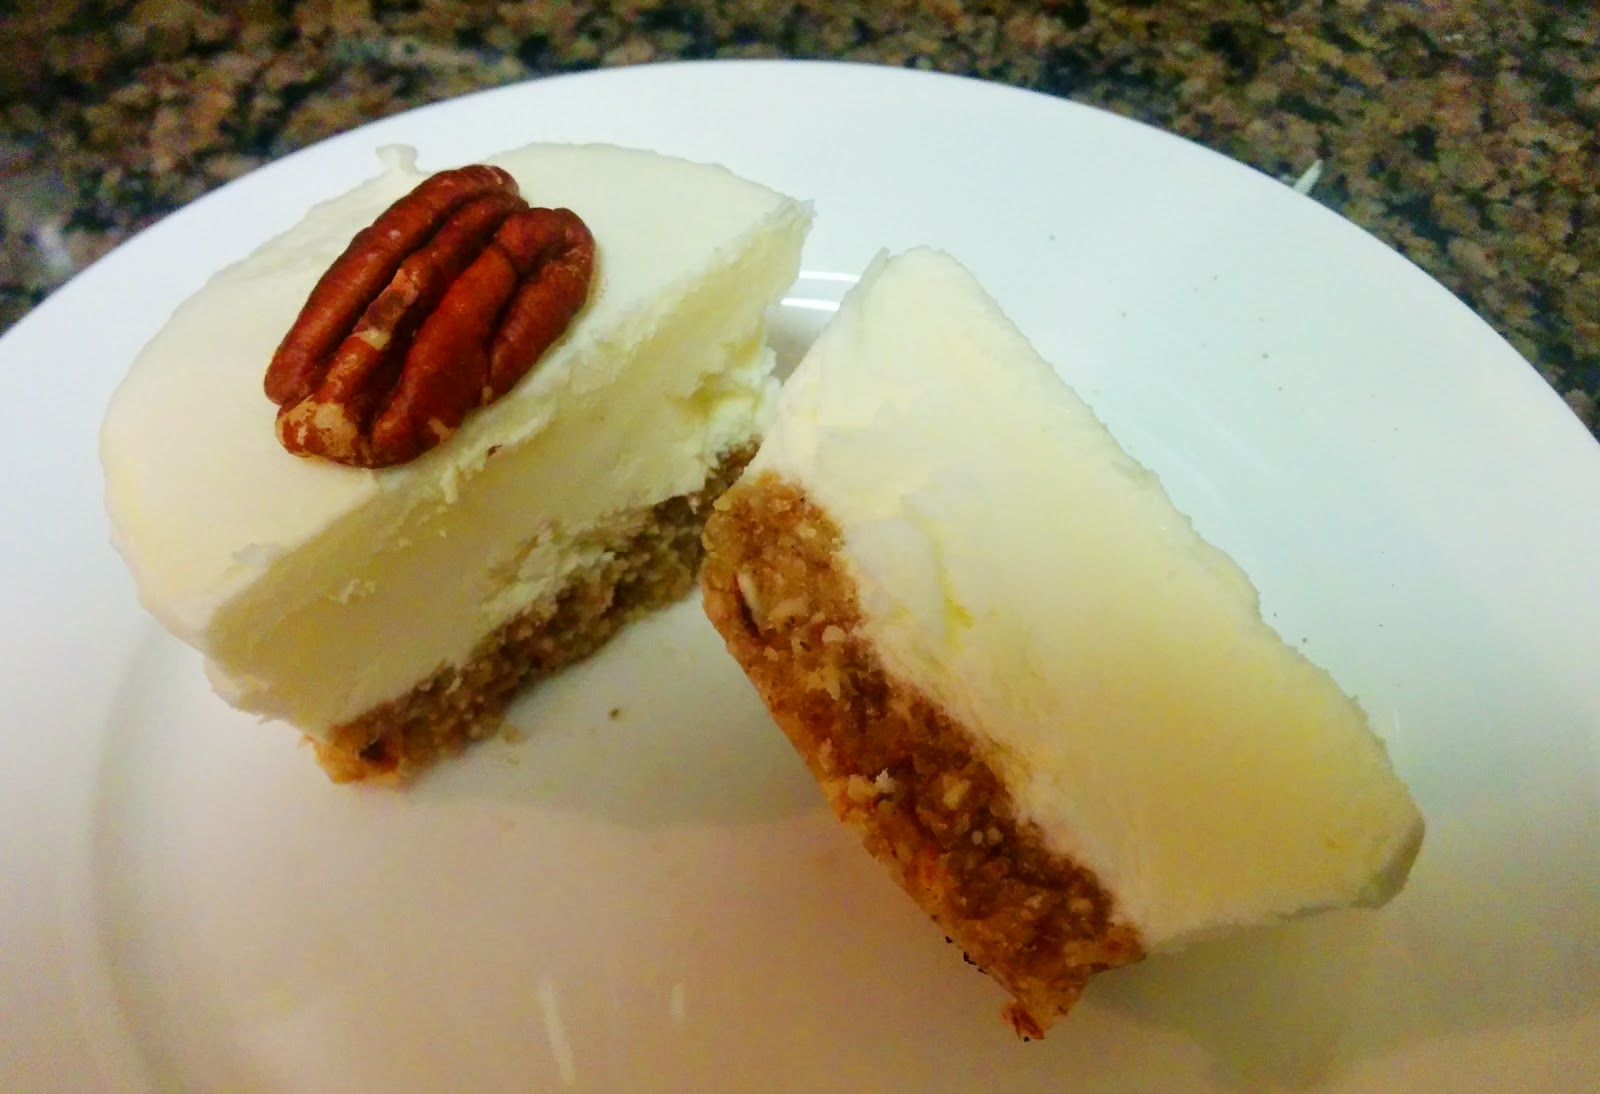
Recipe: No bake low carb cheesecake bites

You can see I'm stocking up on low carb sweets at the moment, having desserts around that fit in a restricted calorie or carb diet make it easier to maintain my weight. I also like to portion control any treats, you'll notice I  use small tins and moulds for many desserts. This avoids the temptation to take "just a little more" and gives me an excuse to make whimsical looking sweets

I tried a number of baked low carb cheesecake recipes with no success on texture, this no bake fridge/freezer cake is my best yet. This is a terribly easy recipe that is delicious and can be adapted to any flavour, whether you're carb watching or not!

Low Carb Cheesecake Bites


Crust


1/4 cup roasted almonds (unsalted)
1/4 cup walnuts
3 tbspn melted butter
1 tspn pumpkin pie spice (or nutmeg/cinnamon/ginger)


  • These cheesecake bites are lovely on their own but add a crust if you want the real dessert experience
  • This mix of nuts and spice makes a great low carb crust that is reminiscent of a Graham Cracker crust
  • Chop the nuts in a mixer or by hand
  • Add the spice, then add the melted butter 1 tbspn at a time until a moist consistency is reached
  • Line the bottom of a pie tin or cupcake tins for individual portions, 1 tspn per mini cake is more than enough

Filling


225g (8oz) Neufchatel or Cream Cheese
125g (or 1 stick) of Salted butter
1 cup heavy whipping cream
1 cup Splenda granules or equivalent sweetener
1 lime or small lemon


  • Neufchatel is the best cheese to give that "just like Sara Lee" taste, but if you can't find it at your local supermarket then any brick of Cream Cheese will do just as well
  • I keep these in the freezer so that 1 batch can last many days, I take out one portion about 20 mins before I intend to eat it
  • If you like a stiffer consistency or would like to serve straight from the fridge rather than the freezer then add 1 sheet of gelatin or replace the sweetener with a box of Sugar Free Lemon jelly (jello) dissolved in half a cup of water
  • Using other flavours of jelly (or sugar free flavour syrups) allow you to mix and match flavours like cherry, raspberry or orange. 
  • Soften the cream cheese either by leaving it out of the fridge for an hour or by microwaving for 30 seconds (make sure to remove the foil!)
  • Melt the butter on the stove or in the microwave; I melt the butter and then take out a couple of spoons for the crust and use the rest in the batter. 
  • Using a hand mixer or food processor mix the Cream Cheese and Butter together. Make sure that you have returned the butter to a luke warm temperature or it will cause the cheese to curdle
  • Grate the rind of your lime (or half of a lemon) and juice the fruit, add both the rind and the juice to the cheese/butter mix
  • Add the cream and the sweetener and then mix on a medium speed until all the ingredients are combined
  • For easy serving into moulds or tins I then transfer the mixture into a measuring jug for easy pouring, the mixture should have the same consistency as melted ice cream
  • Pour your mixture into your moulds and then move into the freezer, this recipe will take around 2 hours to set. 
  • I use silicon moulds for freezing, these are perfect in cupcake form. I put the silicon liners in a cupcake tray and then put the whole tray in the freezer.


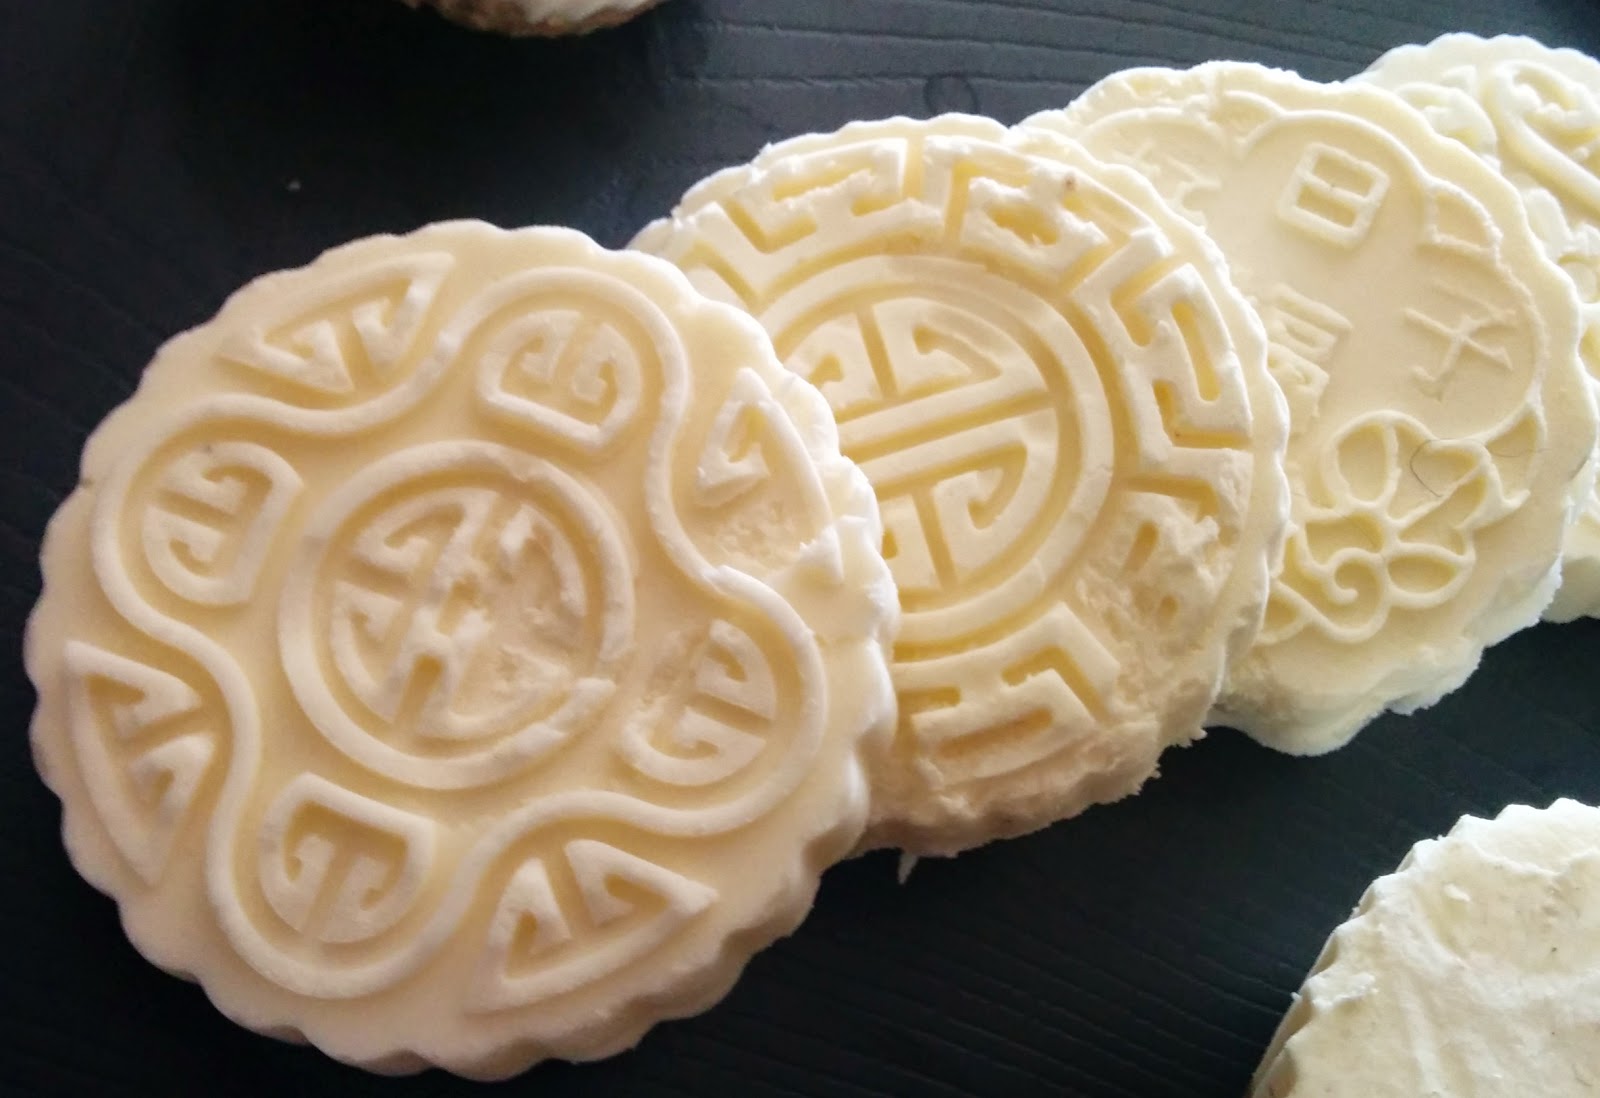
  • These make great frozen 'bites' without the crust, use fancy jelly or ice moulds to make small treats you can pop out any time like these Mooncake shapes I've created with a cheap jelly mould. Without the crust, and in smaller sizes, make these closer to an "every day" treat at around 100 calories each
  • To ensure the shape stays 'perfect' prepare the night before and don't be tempted to pop out until the mixture is firm!
  • This recipe makes 9 mini cupcake desserts, or more if you choose a smaller mould. Macros for 9 servings are 264 calories, 25g Fat, 3.5g Carbs (2.5g Net) per serving
  • Top with a slice of citrus, nuts or fruit toppings if you're not a low carb eater


Sunday, August 10, 2014

The Little Mexican Cooking School, Puerto Morelos Mexico

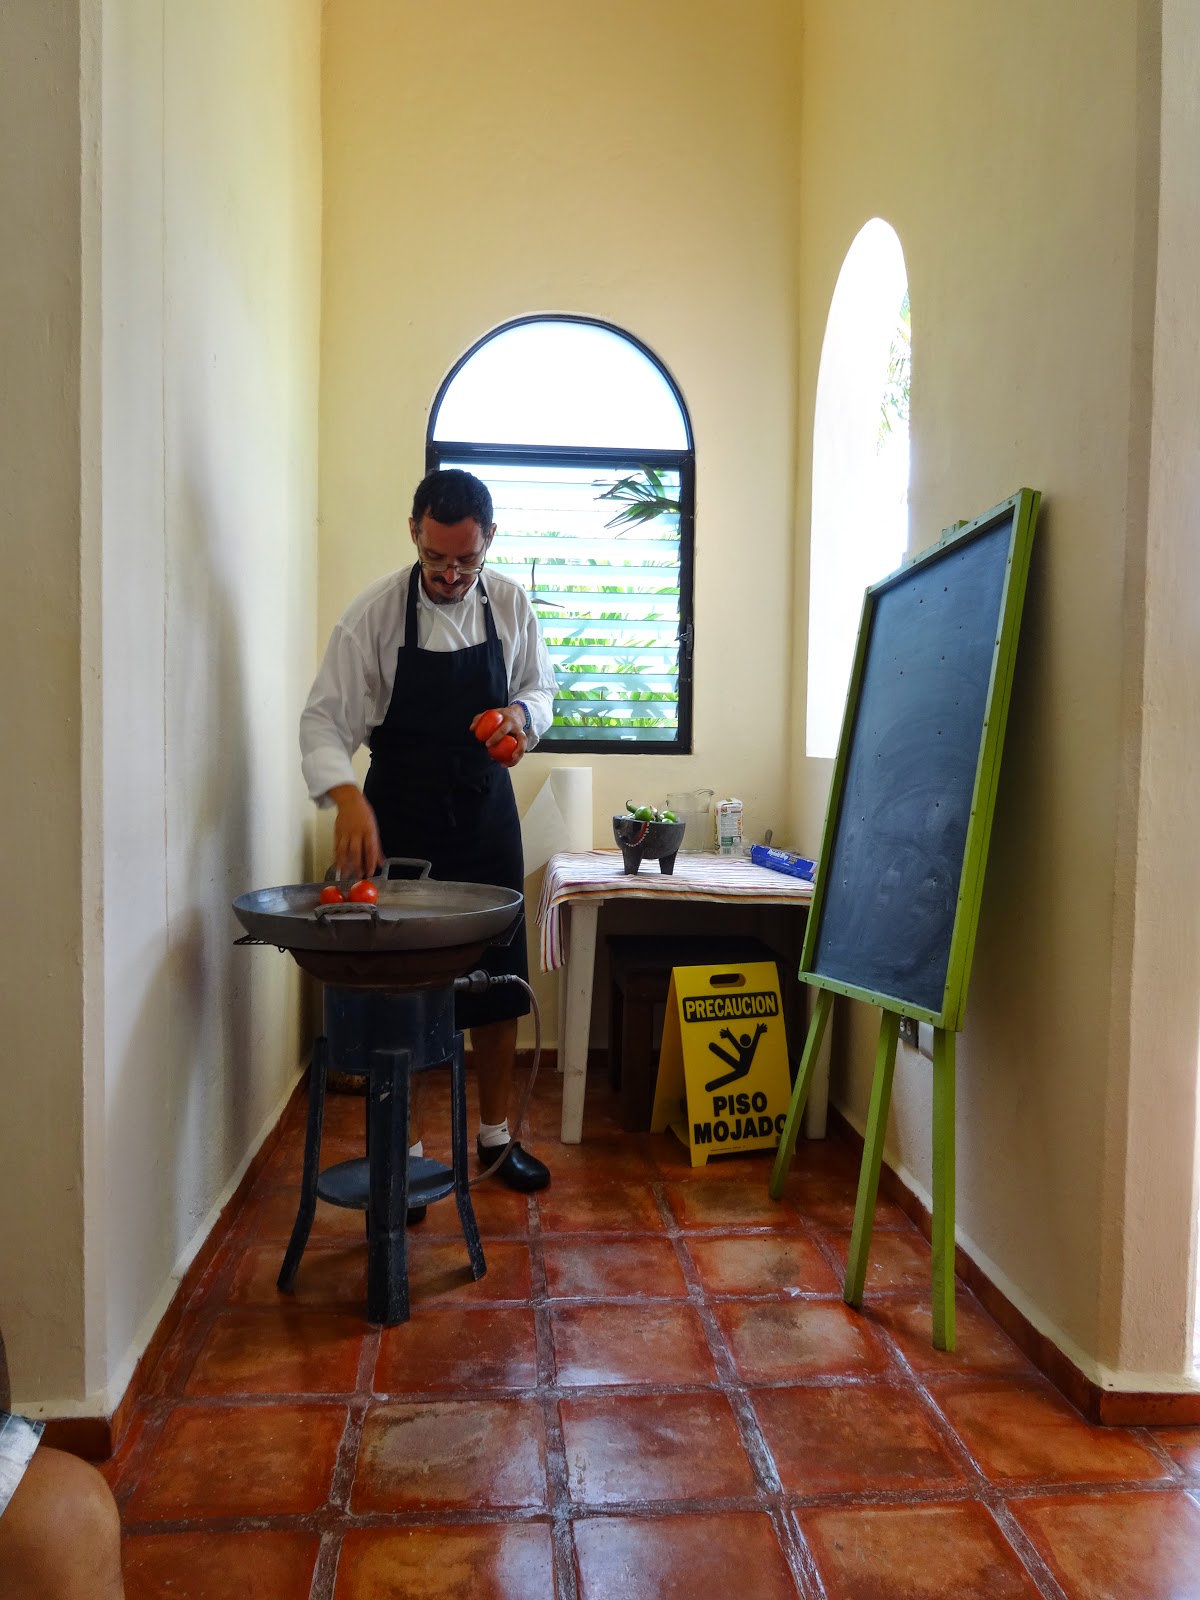
The thing that I like to do most when I have free time is cook so when we were on Vacation in Mexico we took the time to visit the Little Mexican Cooking School. The school is located in a small hotel in Puerto Morelos a picturesque fishing town not far from Playa del Carmen, about a half hour drive from the hotel zone in Cancun. 


The day that we attended was the first time their current chef was returning after a break so he was jovial but nervous - without reason! The entire class was well organised and entertaining and the recipes were wonderful. He took the time to plan out the cooking so that our meal was all prepared and ready to eat as a multi course meal.  


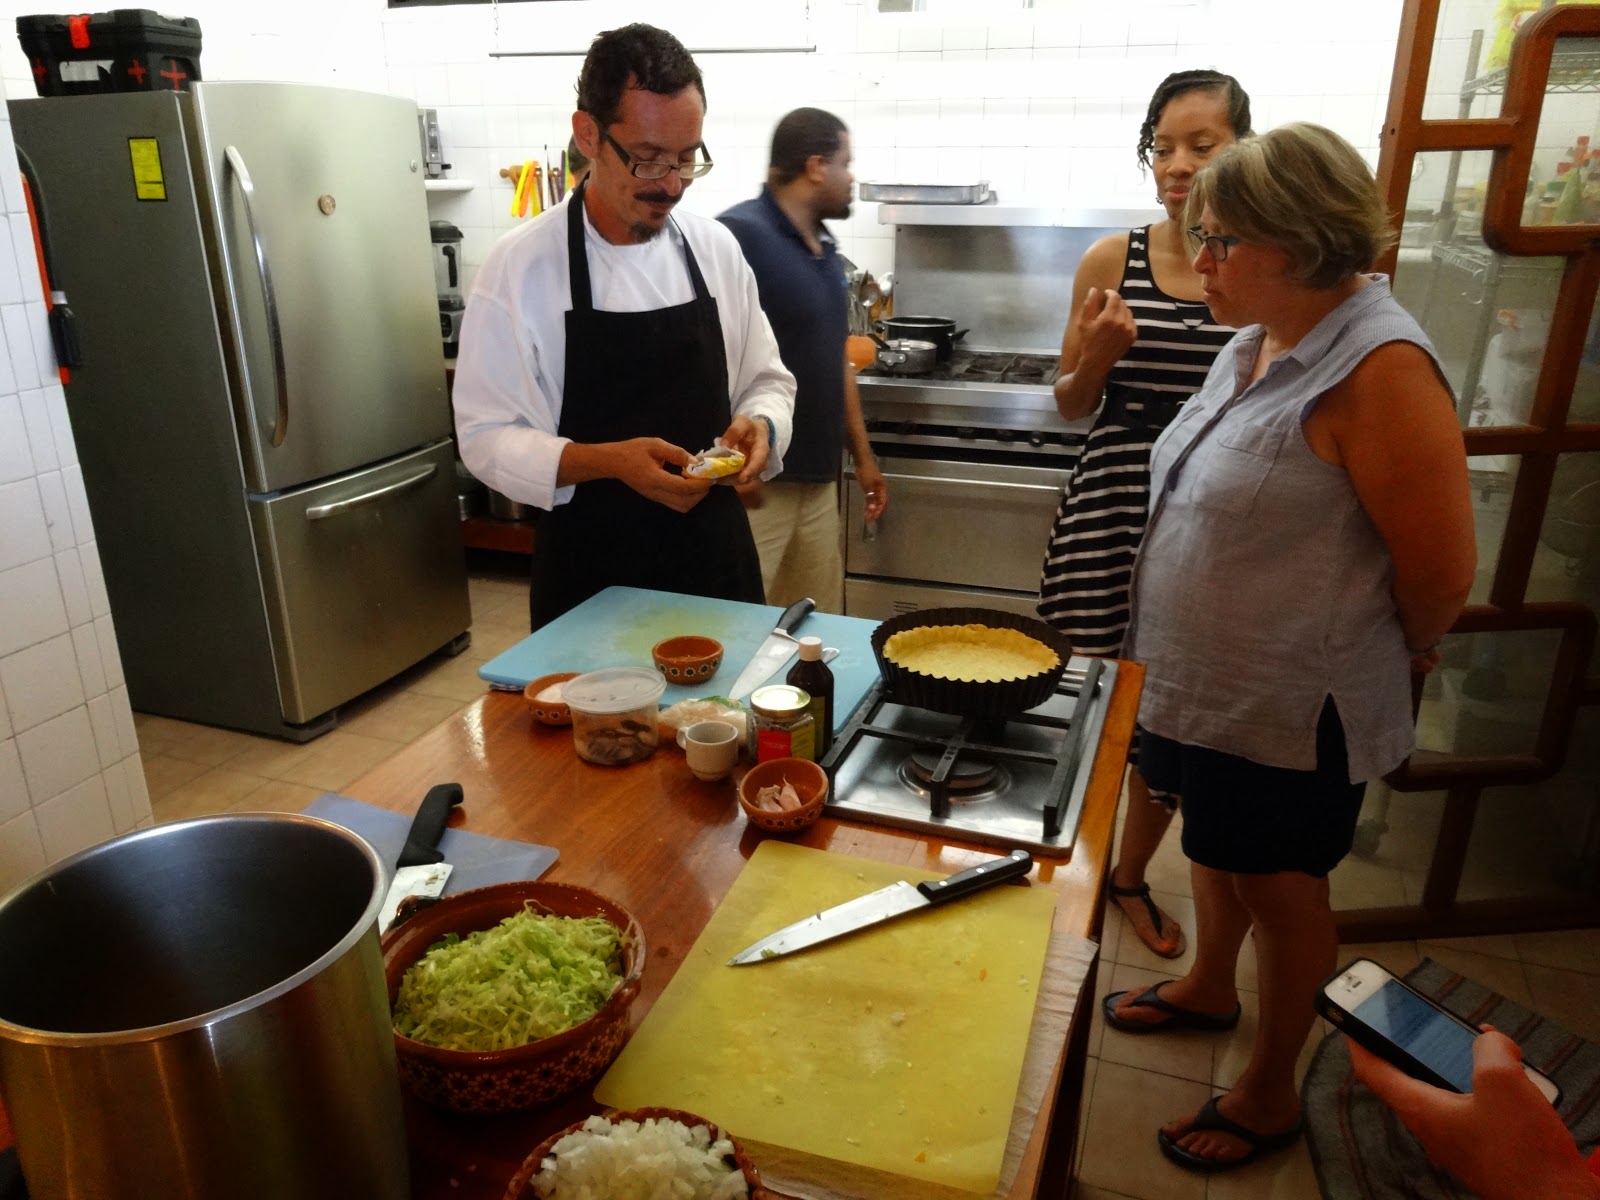
We started with some lectures on the local food and how to prepare it, some misconceptions about Mexican food and the history of some of the major ingredients. Then we moved into the large kitchen to prepare our dishes; a 4 course meal. 


For some of the attendees this included some basic guidance on knife skills, seasoning, mise en place and kitchen cleanliness but it was a great tutorial for the beginner and experienced cook alike. The range of dishes included salsas, soup, appetizers, a main dish and a pastry and covered a great variety of cooking skills was covered like baking, frying, sauteing and more. 


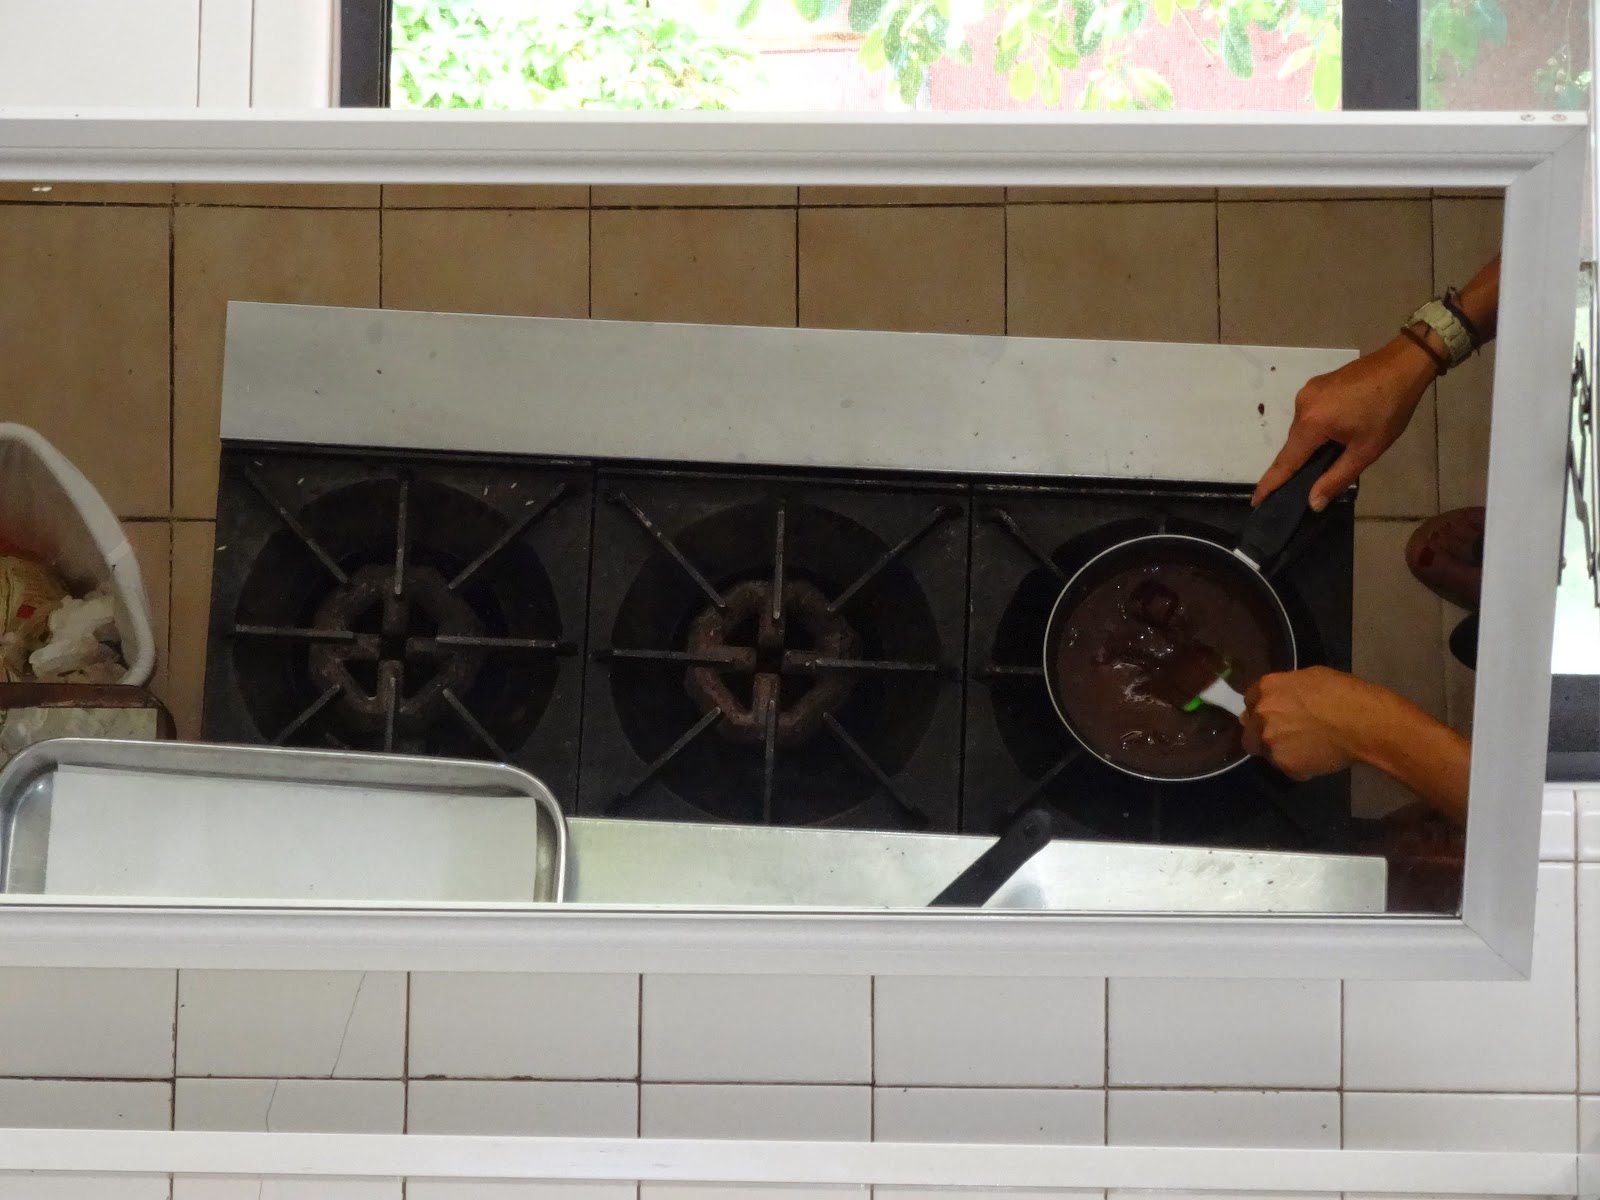
The kitchen is large and well kept and perfectly suited for cooking classes, I was particularly enamoured of this above stove mirror system which meant the whole room could see what the chef was doing on the stove. I wish that my school had had something similar for home economics classes as a teen. 

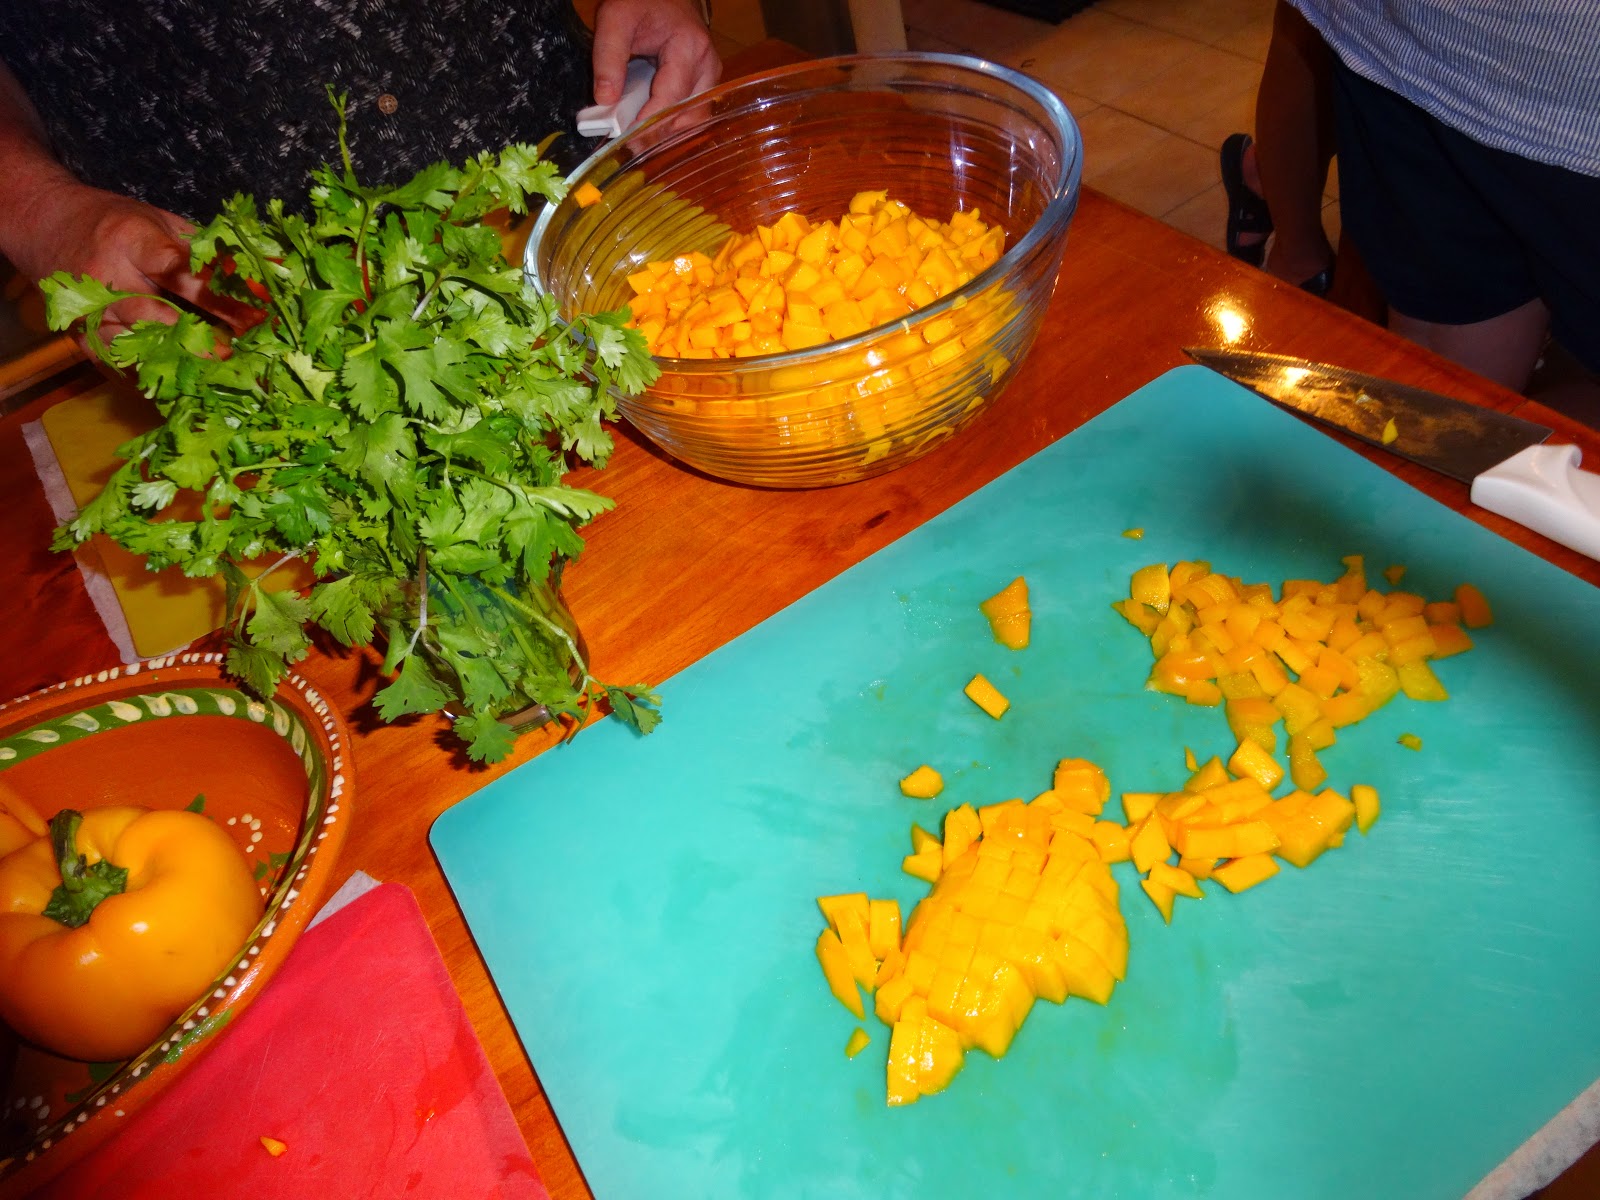
The recipes we cooked that day focused on Caribbean Mexican food; tropical and fresh flavours combined with the familiar spicy comfort food that many were used to eating Mexican in the US.  


The class took up a whole morning finishing with the meal as a lunch so be prepared to spend an entire day at the school. This was well worth the time out of our sight seeing and relaxing schedule though and was one of the more memorable vacation days we've had travelling. 

On leaving the school they provided us with a recipe book of everything we had done that day and a lovely apron each, that I use constantly. Here I'm going to give one of the recipes that they provided but I will say that the experience, the hands on fun and the time we had as a couple make the cooking school experience worth far more than the recipes we walked away with. Much recommended.


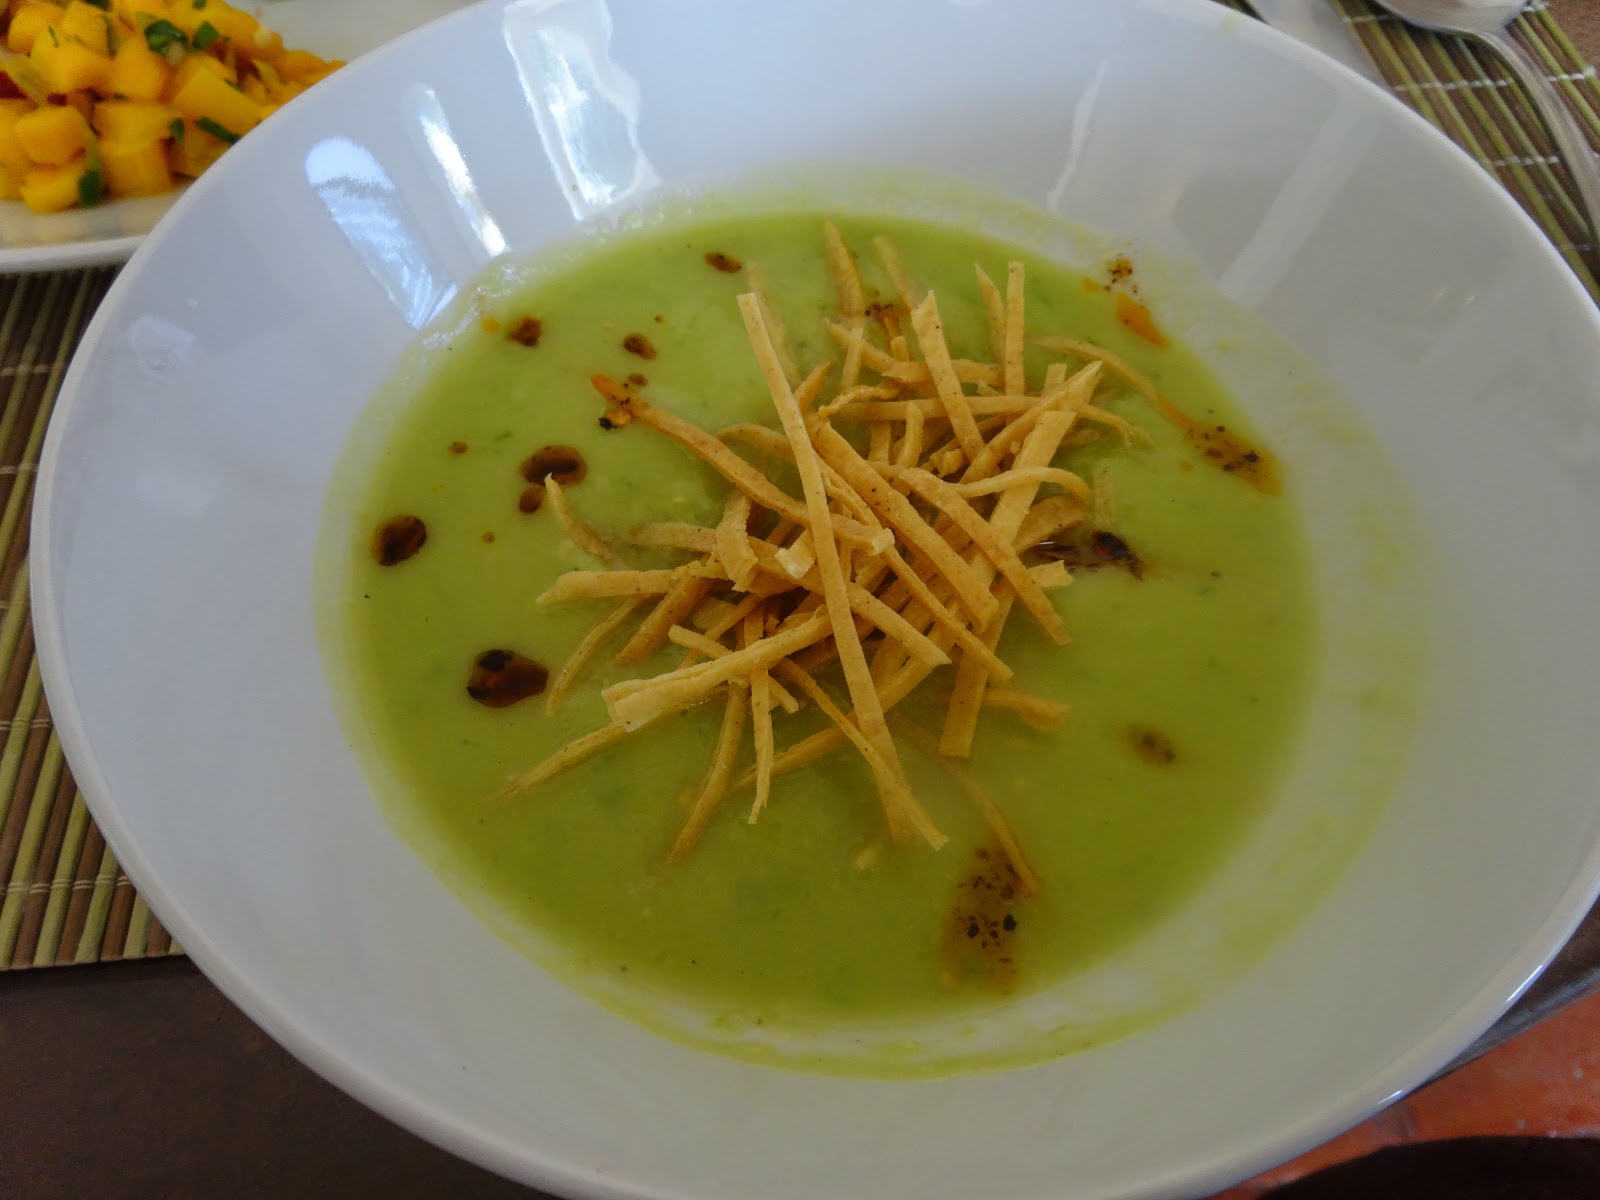
Chilled avocado soup with tortilla sticks and chilli oil


Fresh potato and corn gorditas; including all the salsas and salads


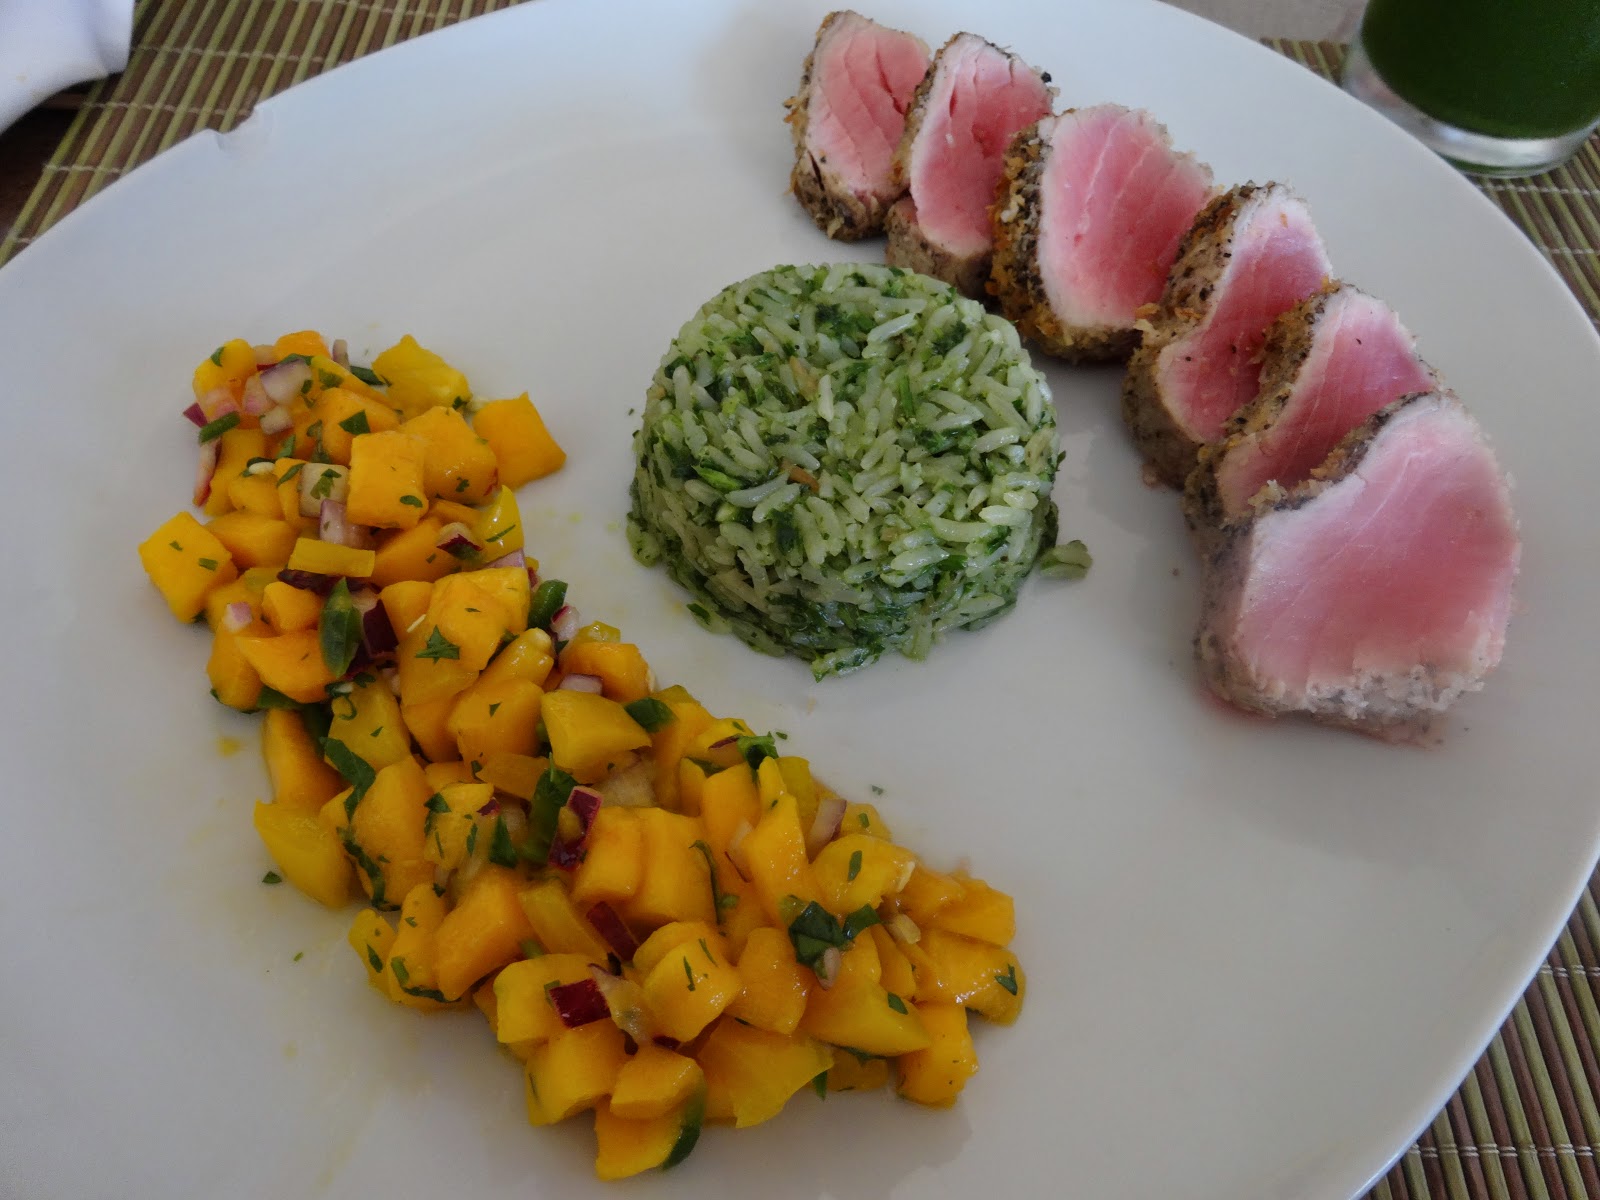
Crusted tuna fillet with mango salsa and cilantro lime rice


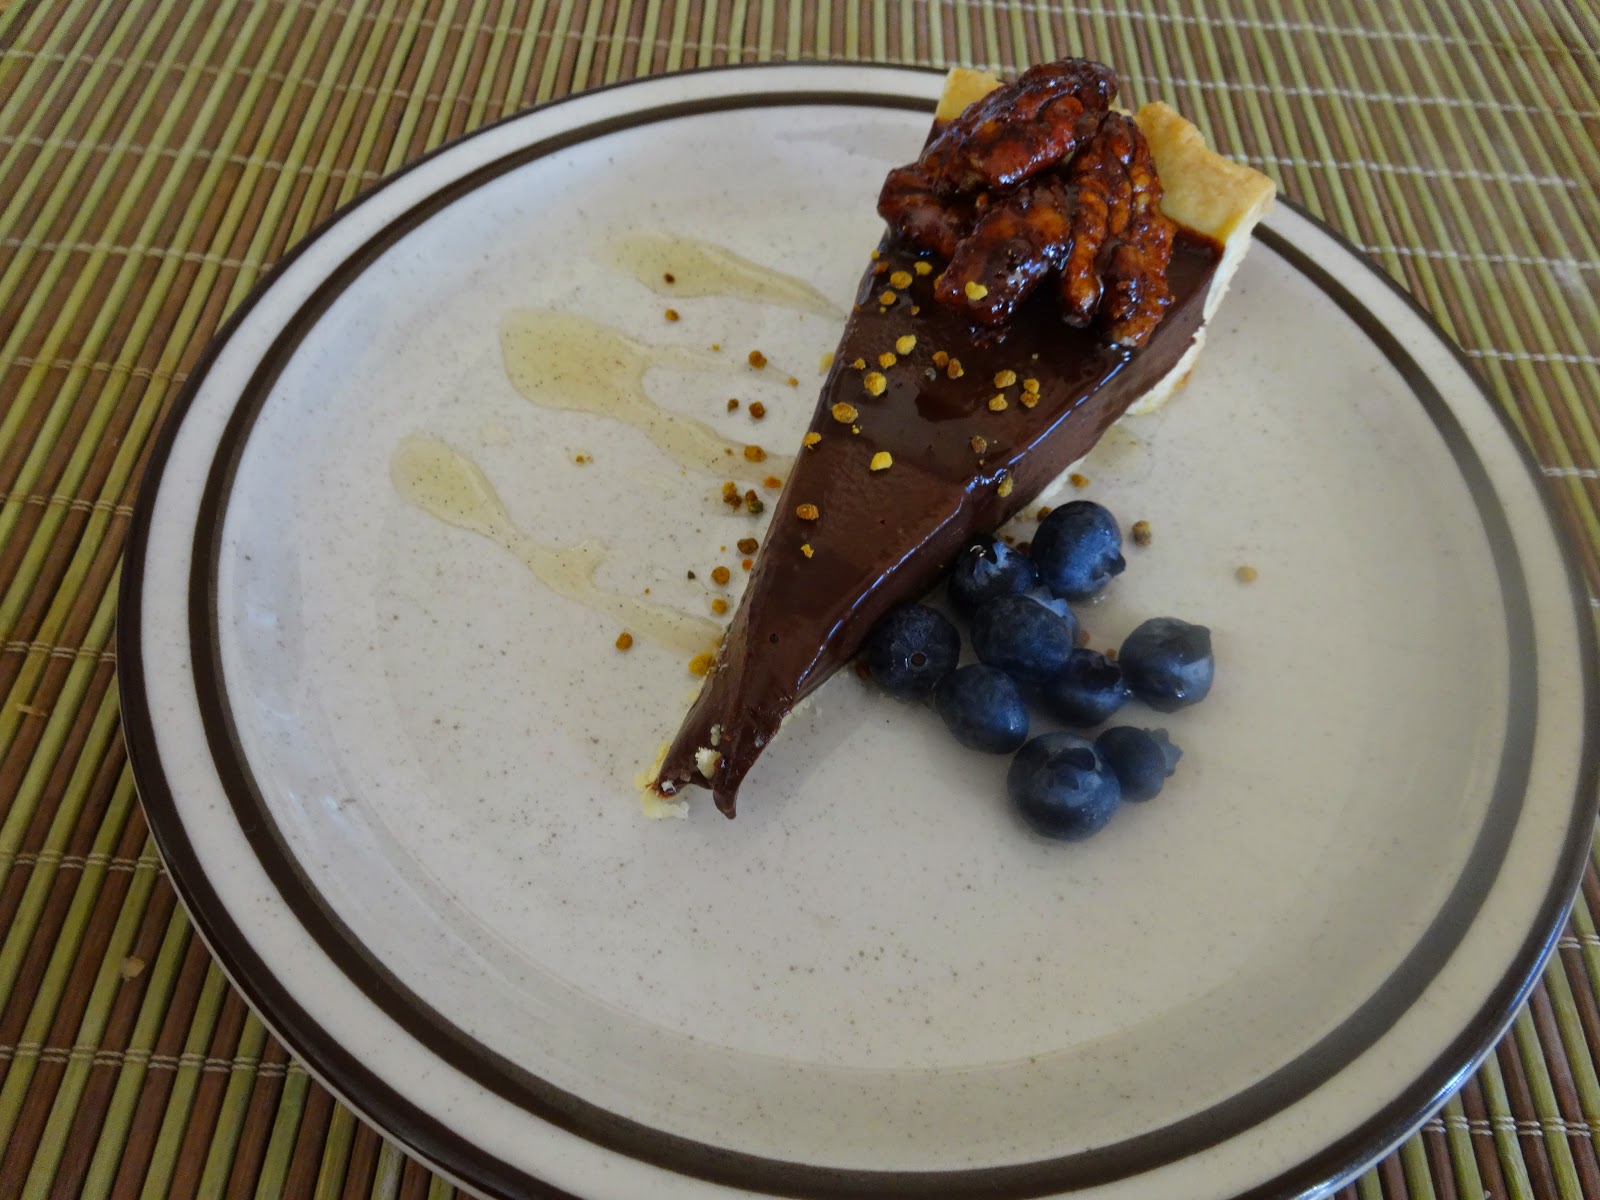
Chocolate Truffle Tart with Spicy Pecans


Spicy nut topping

1/4 cup dark agave
2tspn ground cinnamon
1 tspn ground orange peel
1/4 tspn dried chile arbol (ground)
2 tbspn brown sugar
2 cups pecans
1/2 tspn salt

Method

  • Line a half sheet pan with parchment paper and set asside
  • Mix the agave, cinnamon, orange peel, chile arbol, brown sugar and salt together in a small bowl
  • Place the nuts in a skillet and set over medium heat. 
  • Add the nuts to the skillet and cook while stirring frequently for 4 -6 minutes until they start to brown and a toasty scent is found
  • Add the spice mix to the skillet and stir continuously until the mixture thickens and coats the nuts, approximately 2-3 mins
  • Transfer the nuts to the sheet pan and separate with a spatula. Allow the nuts to cook then use to top pastry or on their own with cheese or dried fruit

Crust

3 cups plain flour
1 tsp salt
1 cup cold butter cut into cubes
1 large egg
1 tbspn white vinegar
3 - 5 tbspns cold water

Method
  • Preheat oven to 220C (425F)  
  • In a small bowl mix egg, vinegar and 3 tbspn water
  • In a food processor combine flour and salt and pulse slowly. Add buttter and pulse until you get a small crumb consistency
  • Add the egg mixture and continue to pulse until the dough comes clean off the sides of the mixer
  • Portion dough into 2 equal disks and rest the dough in the fridge for 1 hour
  • Roll out the dough onto a lightly floured surface into a 20cm (8 inch) circle 
  • Transfer to a shallow tart pan, cover the bottom of the pastry with a circle of foil and 2 cups of dry beans (to dry bake the pastry flat)
  • Bake pastry for 10 minutes
  • Remove the beans and foil and continue cooking for another 10 mins until light brown in colour
  • Rest the crust for 30 mins to cool before adding the filling

Filling

1 cup heavy cream
5 oz (125g) dark chocolate
1 tablet Mexican chocolate
1/4 cup melted butter
2tbpsn toasted ground coffee
2 oz liqueur - Xtabentun for Mexican flavour or your choice of spirits
2 tspn Vanilla extract 
1 tspn ground cinnamon

Method
  • In a small pot bring the heavy cream to a boil and then take off the stove
  • Mix the chocolates and butter into the cream folding well until you see that the butter is encorporated
  • Add the rest of the ingredients to the chocolate and mix
  • Pour the chocolate mixture into the tart shell and place in the fridge for 3 hours to set completely
  • Top with spicy nuts, cream or other garnish of your choosing
  • Serve with fresh berries and wild honey

The Little Mexican Cooking School

http://www.thelittlemexicancookingschool.com/

A hands on, all day cooking class 
Fun for beginners and foodies alike

Av Javier Rojo Gomez
77580 Puerto Morelos, Quintana Roo
Mexico

Saturday, August 9, 2014

Recipe: Chocolate Chip Cookies

I like to post my 'best classics' recipes on occasion for those who are just learning to cook or looking for a great rendition of a standard dish. This cookie recipe is an excellent rendition of a classic. Not too sweet, but very rich.


Chocolate Chip Cookies

3/4 cup castor or baker's sugar
3/4 cup packed brown sugar
1 cup (250g) salted butter, softened
2 tspn vanilla essence
1 tspn ground cinnamon
1 egg
2 cups plain flour
1 teaspoon baking soda
1/2 teaspoon salt
1 cup nuts - (1/2 cup Walnuts and 1/2 cup Pecans)
2 cups chocolate chips


  • I use half and half Walnuts and Pecans to get that classic cookie taste but any nuts you have on hand will do. 
  • Dark or semi sweet chocolate chips add the best flavour; using 2 or more brands of chocolate chips will give variation in the texture and add interest. 
  • To reduce calories I use sugar free chocolate chips and replace the castor sugar with Splenda. Do not use all Splenda or the cookies will not brown

Method


  • Preheat oven to 165C (325F) 
  • Soften the butter either by leaving it out of the fridge or using the microwave. Butter that is partially melted has the best results for the final cookies. 

  • Cream the butter and sugars together using an electric mixer, once the butter has lightened in colour add the vanilla and the egg and whip until well combined. 
  • Add the flour, baking soda and salt and then mix until a dough is formed.


  • Coarsely chop the nuts, if you have a herb grinder or small food processor this will give the best consistency. 
  • Add the chopped nuts and the chocolate chips to the batter and then mix thoroughly using a spatula


Testing the effect of portioning on the final results - scoop cookies, chilled batter, hand shaped, spoon drop, batter balls


  • I spent some time experimenting with different methods of portioning and baking the batter to give the "most attractive" cookies and these gave the most consistent results. Use a spoon or your hands if this is too much bother
  • Line 2 cookie sheets with baking paper or silicon baking liners; make sure to let the sheets and liners cool before reusing them or the butter in the batter will melt and change the shape of the cookies
  • Using a cookie scoop measure out the batter into drop cookies (around 1tbspn of batter per cookie) spaced around 2 inches apart
t

  • Do not flatten or otherwise reshape the scooped batter. Add some extra chocolate chips to the top of the mounds so that some chips will be exposed above the cookie. 
  • Put the tray with portioned cookies into the freezer for 15 mins, cooling the batter gives better shape and reduces spread during baking
  • Once the batter is frozen place the tray into the oven to bake for around 15 mins or until the batter is very lightly golden brown - remember that the cookies will continue to bake slightly after being removed from the oven

  • Cool on a rack and serve with coffee or cold milk. Store in cookie tins lined with baking paper and keep for 1-2 weeks if you can.

Sunday, July 6, 2014

Recipe: Blueberry Yoghurt Pancakes

Brunch is a much loved meal in our house and weekends are all about taking the time for special morning meals. The yoghurt in this dish adds a tangy note that sets off the blueberries well but also makes a hearty meal without additional fat. 


Blueberry yoghurt pancakes

1 cup flour
1 cup sugar
1 cup yoghurt
1 cup fresh or frozen blueberries
1 cup milk or almond milk
2 eggs
1 tspn vanilla
Oil for frying

Method

  • Sift the flour into a bowl and add the sugar
  • In a small bowl whisk the eggs and vanilla, then add the milk
  • Add the liquid ingredients to the flour, stir until a batter is formed
  • Add the yoghurt and stir until incorporated into the batter
  • Fold the blueberries carefully into the batter 
  • Heat a skillet over medium heat and add oil to the pan
  • Using a ladle or jug (pitcher) pour a pool of batter the size of your palm into the pan
  • Once bubbles appear in the pancake then flip carefully so as to not break the blueberries
  • Serve with your favourite pancake toppings like maple syrup, powdered sugar and lemon or more yoghurt and blueberries (as pictured)
  • Makes 6 pancakes


Monday, June 30, 2014

Recipe: Oatmeal & Craisin cookies

Cookies are a fast and furious way to make a sweet treat out of cheap cupboard staples. Whether you have guests coming, children in need of a snack or just have a craving for a good book and a cup of tea these cookies are a spicy and delicious morsel. 


Oatmeal & Craisin Cookies


250g (2 sticks) butter
1 cup brown sugar
1 cup sugar
2 cups flour
2 cups oats
3 eggs
1 tspn vanilla
1 tpsn baking soda
2 tspns cinnamon
1 pinch salt
1/2 cup pecans
1/4 cup craisins (dried cranberries)


Method


  • Preheat the oven to 190C (375F) and line 2 cookie sheets with baking paper
  • Soften the butter and add to a large mixing bowl, cream the butter using an electric hand mixer
  • Slowly add both types of sugar and cream with the butter until smooth
  • Beat in the eggs 1 at a time and then add the vanilla
  • Sift the flour, cinnamon, salt and baking soda into the bowl and mix into the batter
  • Chop the Craisins and pecans into pieces and add to the batter, mixing thoroughly
  • Using a tablespoon measure spoonfuls of batter into the hand and roll into balls, place around 5cm apart on the cookie sheet
  • Flatten the balls into a cookie shape using a fork and place the tray into the oven
  • Cook for 8 to 10 minutes or until browned
  • Let the cookies cool on the tray for 5 minutes and then transfer to a wire cookie rack
  • If you have the willpower let cool completely before storing in a cookie jar or tin or try not to burn your fingers as you eat them warm
  • Budget busting? Switch the pecans and cranberries for cheaper ingredients like raisins, peanuts or chocolate chips
  • Lighten the calories by using light margarine in place of butter, Splenda in place of sugar and reduced sugar Craisins

Monday, January 20, 2014

Recipe: Chocolate Cake

Everybody needs a good chocolate cake recipe and this is by far my favourite; it always turns out dark, moist and delicious.


Chocolate Cake


2 cups plain flour
2 cups sugar
3/4 cup cocoa
2 teaspoons baking soda
1 teaspoon salt
1 cup milk
1/2 cup vegetable oil
2 eggs
2 teaspoons vanilla extract
1 cup boiling water

Method


  • Preheat oven to 175ºC (350º F). 
  • You can use soy or almond milk in place of the dairy with no effect on the taste but choose the oil you use with care - olive oil can flavour the cake. Canola or other light vegetable oil is perfect. I use Dutch processed pure Cocoa for baking.
  • Prepare 1 large or two 9-inch cake pans by spraying with baking spray or buttering and lightly flouring.
  • Add dry ingredients to a large bowl or the bowl of a stand mixer; whisk or stir through to combine ensuring that the salt, cocoa and soda mix well through the flour
  • Add milk, vegetable oil, eggs, and vanilla to flour mixture and mix together on medium speed until well combined. 
  • Reduce speed and slowly add boiling water to the cake batter, continue beating for around 1 minute to aerate the mixture. 
  • Place the cake tin(s) on the middle rack of  your oven and bake for around 30-35 mins until the cake springs back to the touch. 
  • Take the cake out of the oven and leave for 2-3 minutes to rest, this ensures the cake cools and pulls back from the sides of the tin. 
  • After the resting period turn the cake out onto an airing rack to cool, ensure the cake is entirely cool before icing or the frosting will melt.

Chocolate Frosting


1.5 cups butter (3 sticks), softened
1 cup cocoa or 100g melted dark baking chocolate
5 cups icing (confectioner's) sugar
2 teaspoons vanilla extract

Method


  • Soften the butter by leaving it out of the fridge for an hour or microwaving for 20 seconds
  • Cream the butter and cocoa/chocolate mix to a smooth consistency
  • Add sugar cocoa mixture by 1 cup of sugar at a time. After each addition has been combined, turn mixer onto a high speed for about a minute.
  • If the consistency is too thick add hot water 1 tablespoon at a time until a fluffy frosting consistency is reached. 
  • Place the frosting in the fridge for 15 minutes prior to icing the cake, this makes it easier to work with. 
  • If desired cut the cake in half and frost through the middle of the cake; then place the two halves back together
  • Using a spatula or a butter knife spread the frosting all over the cake, if it begins to melt place the cake in the fridge to cool before continuing. 
  • Once the cake is frosted place it in the fridge and take out 5 minutes before serving. 

Sunday, October 13, 2013

Review: Sweet Maple, San Francisco

One of the things they don't tell you about growing up is how wonderful brunch is, a misspent youth meant I rarely saw lunchtime on a weekend. You get a little older and a lot less single and find yourself spending less time hugging the bathroom floor on a Sunday morning; suddenly breakfast sounds like a great idea.

Finding a great brunch spot in a new city is often a gamble involving overcooked eggs and generous but doughy pancakes. Luckily for us it turns out that one of the best brunch spots in San Francisco happens to be in our building.

Sweet Maple is a bustling cafe in Pacific Heights, at the corner of Steiner and Sutter Streets; often found with a large cult following queued up on the sidewalk outside. They only open for Breakfast and Lunch (9am - 3pm) and have a menu to match, but with this kind of business you can't imagine they need to open for dinner.

The waits can be long; being in our building we have the choice of pottering down at will but I would recommend coming before 10am or after 1:30pm on a weekend. The cafe caters well to the queue though with magazines, free coffee and water on hand as well as numerous chairs and benches.


Americano $2.75USD (milk based espresso drinks $3.75USD)

The coffee is easily the best I've had in San Francisco. They use all single origin coffees with a standard 2 shots per drink; delicious.


Big Hip French Toast - Millionaire style $12.95USD

The cafe really has every breakfast option one could imagine but what they are famous for is the "Millionaire Bacon" thick cut apple wood smoked bacon baked in Maple Syrup and Spices. You can add eggs and the famous bacon to any French Toast order.


Hass Benedict $13.50USD

I love the variations they have on classic dishes here; in this case I have ordered an eggs benedit with slices of roasted turkey, an entire avocado and a divine Chipotle Hollandaise. The sauce is delicious and the meat flavourful and moist, though I do not eat them I am assured that the side order of varietal potatoes is excellent.

The selections are endless though - all the meats are grass fed and delicious, the bread products are top quality (a notable a rarity in the US). Though pricey at $4.75 the homemade sausages, pork lime or chicken apple, are a definite must as a side for the protein lover. Fruit, pancakes, egg dishes and even lunch meals like salads and burgers are available. There's also a huge range of sides and additions for an extra on your meal, I can't imagine anyone not finding a dish they loved. Everything is delicious and the entire restaurant is filled with smug looking patrons.

What amazes me more than than the food is the service; despite being busy we are seated quickly and attended to graciously. The food comes within a few minutes of us ordering. What else can I say? This is almost the perfect brunch venue, much recommended and I look forward to taking visitors.

Sweet Maple 


2101 Sutter St, San Francisco, CA ‎
(415) 655-9169 

Sunday brunch perfection
Come early or late or expect to wait

 
View Larger Map

Saturday, January 14, 2012

Serious birthday cake at Zumbo Patissier, Pyrmont

I work in Pyrmont close to The Star casino complex and an exciting new addition has come to the neighbourhood; Zumbo Patissier the super luxurious, delightfully decadant cake and pastry maker that makes all foodies in Sydney go to happy little day dream places. The love child of culinary genius Adriano Zumbo this store makes an excellent addition to The Star's recent upgrade.


Sadly being January things are a little more sensible on my diet this month but it's definitely worth noting the Dessert Train!


Set up like a kaiten zushi with small pieces of delight wizzing past on a motorised conveyor belt. Note if you are intending to go that there's a significant wait on popular nights, so don't expect to pop straight in after a meal or a game elsewhere in the building.


Sydney is still on a long running obsession with macarons (cupcakes are sooo 2008) and Zumbo's is definitely one of the best purveyors of these delights. Remember though these little pieces of heaven are delicate and difficult to make, meaning they're definitely a 'treat' food and should be purchased the day you intend to eat them - humidity is the bane of all macarons.


It was recently my birthday and since I have the luck to date a lovely man who shares my taste for all things rich we went on a trip to the patisserie for some serious birthday cake.


Macarons $2.50 each

Shown here is Salted Butter Caramel, Pumpkin, Lemon Verbenna and Coconut Green Chilli & Lavender. All light, perfect and delicious. I think I could eat a meal of those salted caramel delights and be happy.


ssnowmanorr $9 Pâté a choux, bubble tea custard, lychee coconut crème légère, lychee gel, coconut crunch.

Zumbo loves delightful little food tricks and this is genius, it is essentially a bubble tea made into a delightful little cake, complete with milk tea flavoured custard and chunks of Lychee jelly. Despite the heavy creamy interior the outside maintained a light crisp texture that oozed when bit into.


grandma's soap $9 Blueberry compote, fresh blueberries, lavender chantilly & almond cème

This was probably my favourite of the lot, I would love to see the mould that the lavender and creme layer was made with to get it out so smooth and perfect. The bottom was a slightly tart mix of almondine and berry that was offset perfectly by the sweet sweet cream layer.


whizz fizz $9 Raspberry meringue, sherbet, raspberry compote, liquorice crème

This was definitely the boy's favourite. WhizzFizz is a brand of Australian sherbert, the sugary fizzy kind not the cold kind, so expect something a little different from this raspberry meringue pie. The crisp light meringue gives way to rich berry and cream; don't be afraid of the liquorice if you are not a fan it's not strong and compliments the fruit layer perfectly.


√ caramel $9 Passionfruit crème, ginger vanilla bavaroise, tonka bean caramel, ginger sable breton, caramel chantilly, caramel sponge

The texture and construction of this dessert is simply amazing. It's a tiny entremet cake with many finely created layers in a small caramel 'box' with a texture like felted caramel. with the amount of caramel in here you'd think it would be sweet on sweet but there are darker burnt sugar tones and the ginger that set the mouth ablaze. An absolute amazement in construction and to make this many flavours work together in harmony deserves accolades.


Be aware this was simply ridiculous amounts of cake and took us several days to eat, even without me dissecting and photographing every morsel we bought. One and a half of these tiny rich delights was more than enough to fill me up despite no dinner. If you're looking for a fancy gift for an in law or just a small delight for a special occasion one or two of these with a cup of unsweetened coffee would delight even the grumpiest of diners. Much recommended, with quite a bit of willpower wrangling to stop me running over on a regular basis.

Zumbo Patissier at The Star

http://adrianozumbo.com/patisserie-menu/
Shop1, Cafe Court
The Star
80 Pyrmont st
Pyrmont, NSW, 2009
Entry via Edward st


Up market patisserie and eat in dessert train
No cafe seating, take your cake home or sit on the waterfront to enjoy
Walking off with a Zumbo box will cause green envy on all foodies in the vicinity


View Larger Map